


Linkage Maintenance
To help keep your suspension running smoothly and to maximise the life of your bearings, we recommend periodic maintenance to ensure everything is working properly. Please follow the steps outlined in the video presentation and reference the steps and exploded diagrams listed below.
The tools you will need are a 5mm and 6mm allen key, a torque wrench (with 5 and 6mm allen key heads) and white lithium grease.
Step 1
Remove the rear wheel to take the weight off the back end of your bike. Using your 5mm allen key, undo and remove the rear shock bolts. Start with the front mount bolt and then the rear mount bolt. The shock can now be carefully removed, pulling it out towards the front of the bike.

*If you have a strap to hand, support the rear triangle to easily access both pivot shafts without obstruction.
Step 2
With the 5mm and 6mm allen keys on alternate ends, loosen the two lower pivots one by one. The screws will come off with the 5mm end and then the shaft should slide out easily on the drive side.

Step 3
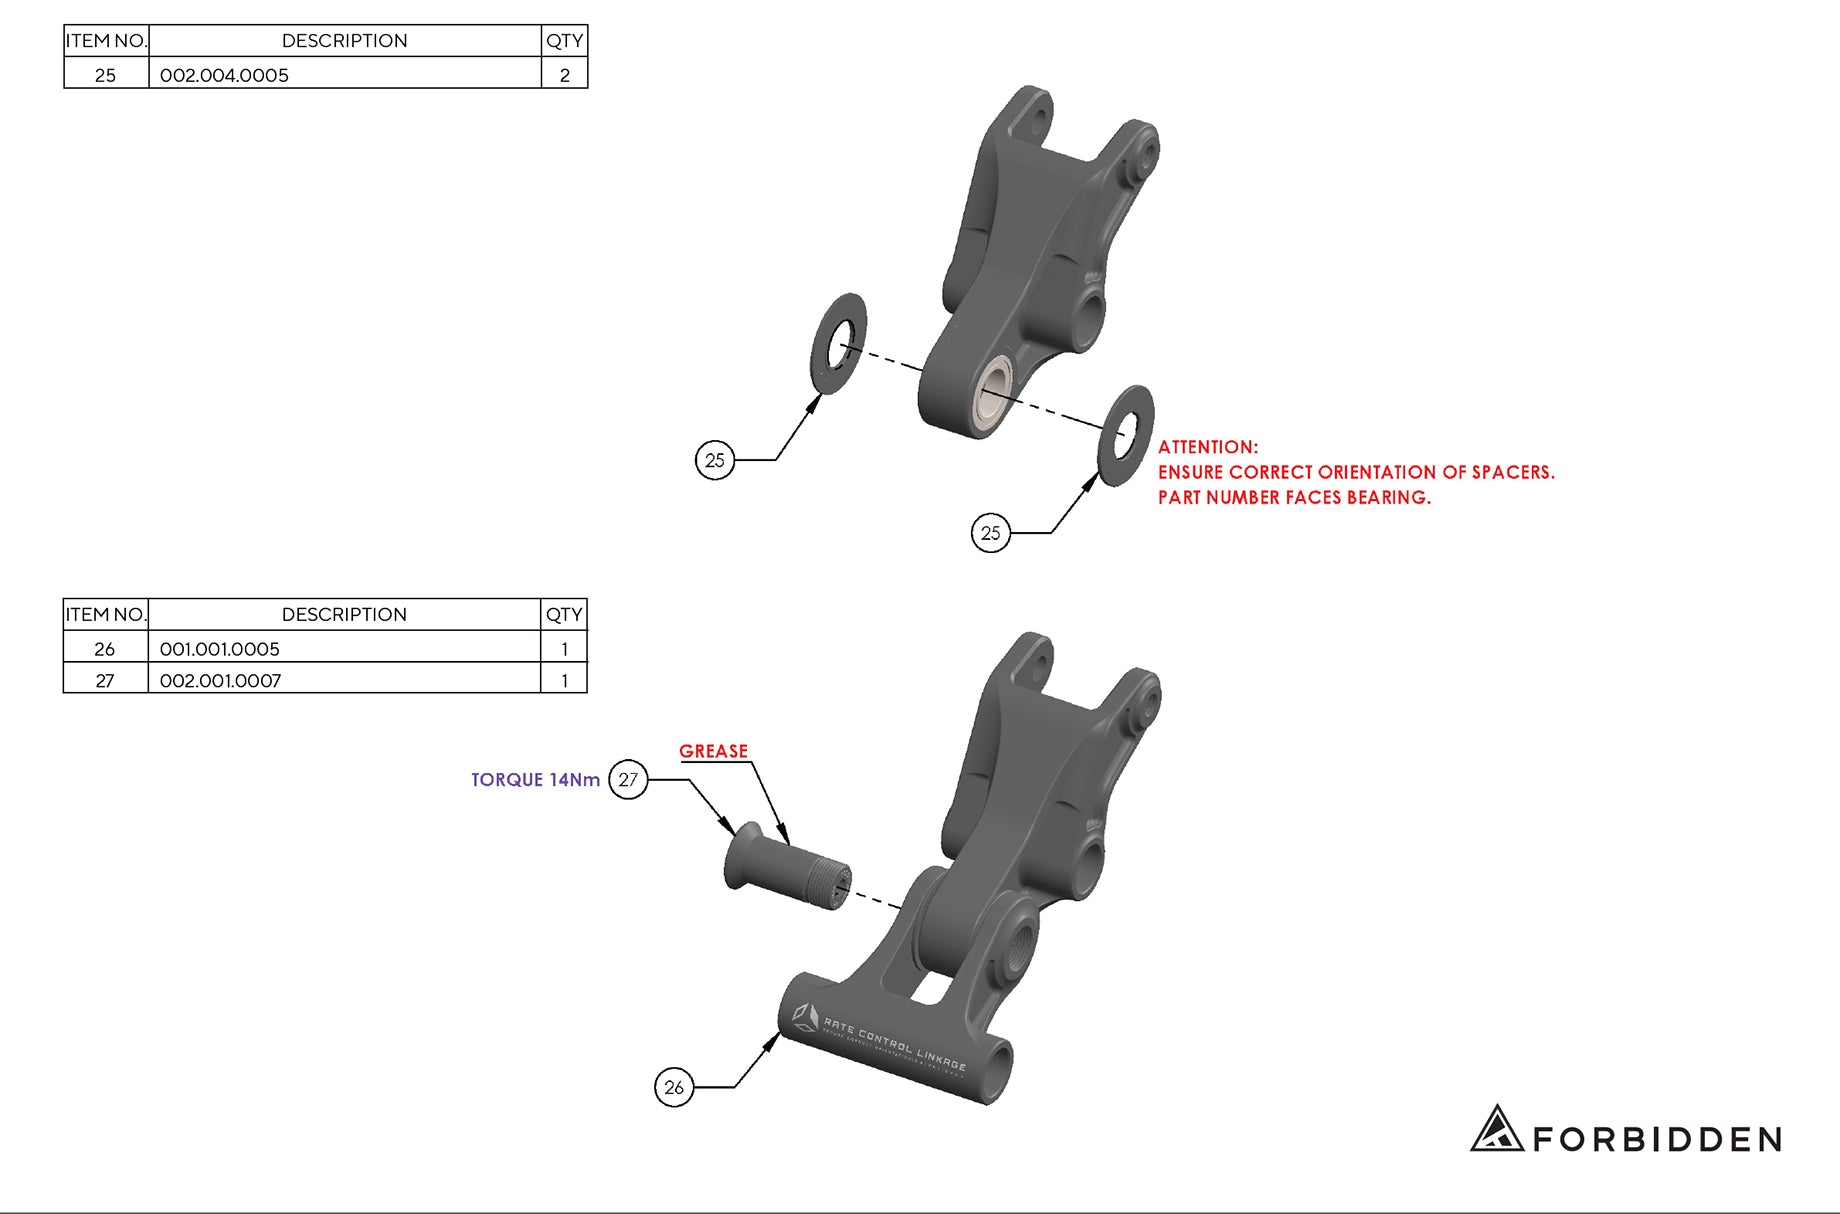
With both shafts removed, the linkage will now come out rearward - be mindful that there are four spacers between the linkage and frame that may drop out. All four are the same, so no need to panic if you don’t see where they fall from. Gather all the spacers and put them carefully together.
Step 4
You’ll now need the 6mm allen key to undo the central shaft holding the two linkage parts together. With the shaft removed, carefully pull the linkage apart over a raised surface, like a workbench, as there are two spacers which you won’t want to lose.
Step 5
Now that the linkage is fully broken down, wipe away old grease and inspect for any wear or damage while also checking the bearings in both the link, the frame and the swingarm. Replacing bearings requires additional specialist tools and is a job best suited to competent home mechanics and professional mechanics alike.
*If you notice anything that needs to be replaced, the exploded diagrams will show you the exact part number required - parts can then be directly ordered from the website.
Step 6
Now that everything is clean, grab some fresh grease and start re-assembling. Start with the shaft that holds the two links together. We use white lithium grease before reinstalling the shaft. Ensure that you have the spacers facing the correct way, with the flush side facing outward. Please refer to the diagrams provided to ensure correct orientation of both linkage parts. The larger upper linkage part has numbers that you’ll be able to see facing upwards, and the words on the smaller lower link are readable. This gets torqued up to 14Nm.
*Double check it’s moving freely.

Step 7
Adding a dab of thicker grease to the four spacers, place each one against each of the four bearings inside the front and rear triangle as per the diagram below.

Step 8
With the text on the lower link looking at you, carefully slide it back into place ensuring the spacers stay put. While holding the linkage in place, line up the first shaft and slide it through. Repeat for the other shaft and reinstall the two shaft screws, torquing them both down to 14Nm.
*Before installing the rear shock, just cycle the back end to ensure it’s moving smoothly.
Step 9
Grab the rear shock and carefully slide it into place, and loosely install the two bolts. Once the shock is in place, torque both bolts to 14Nm.
Step 10
Toss in the rear wheel and you are good to go!